Tutorial: Azure AD B2C authentication in ASP.NET Core MVC » 28 November 2023
There’s a lot of identity providers for ASP.NET. One of the easiest (and cheapest, if you’re under 50k MAU) option is to use Azure AD B2C. Here’s the quickest was to get up and running with an ASP.NET Core MVC app and Azure AD B2C identity.
Create a B2C directory
This is different from your regular Azure AD / Entra directory. Log in to the Azure Portal, click “Create a resource”, and find Azure Active Directory B2C.
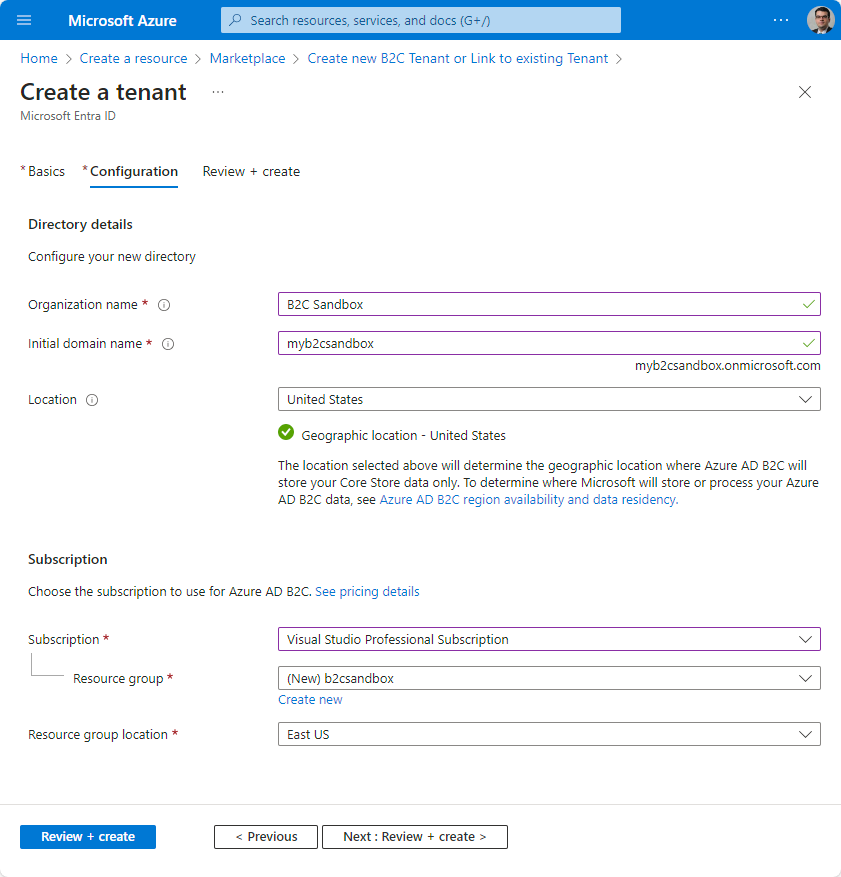
Here, click “Create new tenant”, and fill in its details.
Tenant settings
Next, open the newly created tenant and go to user flows. Create 3 new flows: signup/signin, edit profile and reset password. WHen being asked for a version, select “recommended”.
-
Name: we will reference this (along with the domain entered above) in our app settings. If you enter
SignUpSignIn, the final name would beB2C_1_SignUpSignIn -
Identity Providers: you can set up different identity providers, with email being the default one. Let’s keep it for now.
-
MFA: pick whatever you’d like, but keep in mind that some of these settings would generate extra charges
-
User attributes: here you can specify what pieces of data you’d like the user to provide, and what would be passed to your app in the token responses.
Create application
On the B2C tenant portal, create a new app registration. Provide the name and the redirect URI, which in our case would be something like https://localhost:5001/signin-oidc.
Make sure you enable implicit flows.
Configure the ASP.NET Core MVC app
Create your MVC app like this:

Add the following Nuget packages:
dotnet add package Microsoft.Identity.Web
dotnet add package Microsoft.Identity.Web.UI
Now open Program.cs and add the authentication middleware: app.UseAuthentication();
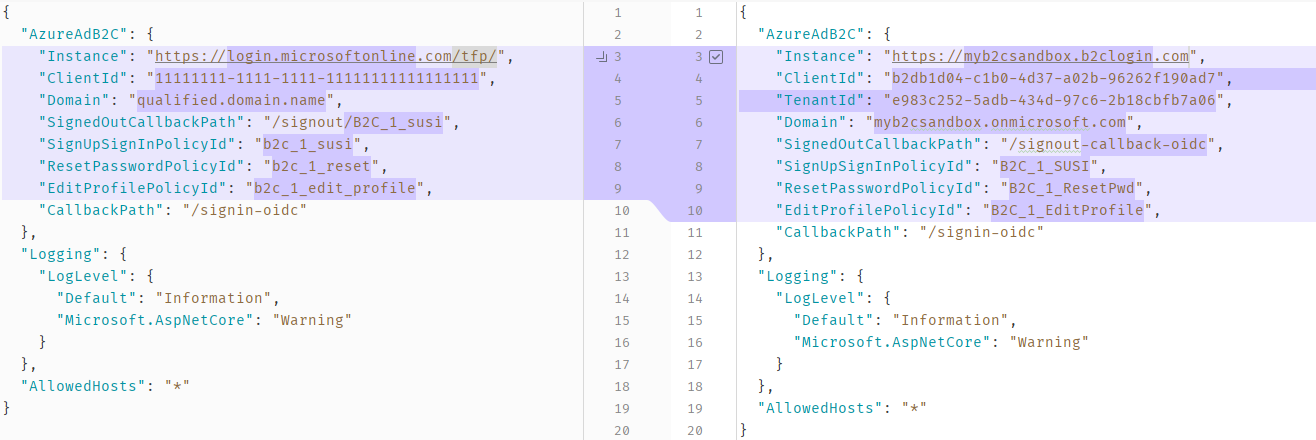
After that, open your appsettings.json and make the following changes: